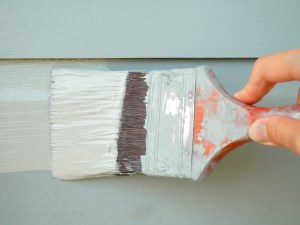
Easy to follow painting tips for painting a room
Thanks to the Toolbox Tomgirl for this episode of Tips from the Pros, about painting a room.

Have you ever walked into a room and saw, black…if not a very deep burgundy wall color….what was your first reaction!?!? Maybe, scream…run away…thinking – “How will I ever be able to cover this up!?!?”
First, let me start off by saying that if you are going over a dark color you will need to use a primer to cover the old color, or you will get a blend of the two colors (old + new) and it may not look like what you were expecting. (And yes, I know this from experience – the wall turned out like baby throw up….yuck.) Also, spackle and fill any nail holes or imperfections. Be sure to sand smooth your areas and use a tack cloth to remove the drywall dust). These few steps that may sound minuet….are actually very important!
Be sure to gather everything you need before you get started. It really is a hassle to keep stopping and getting things together. Here is a short list of the things you will need (add to this as you wish).
1. Various sized paint brushes (4” (can use a slanted/angle brush) for cut in edge between wall and ceiling and a 1” for around the window frames).
2. Rollers (get good quality and de-fuzz them using the 5 in 1 tool to run the roller through against the nap to release most of the fuzz).
3. Extension pole and roller handles (be sure you get the right sizes for the rollers you are using).
4. Tarps or plastic to cover furniture or the flooring.
5. Paint tray for the large areas and paint buckets for trim work.
6. 5 in 1 tool (you can open the can, roll off the fuzz from the roller before you start and roll paint back into the can when you stop). You can also use this to scrape off imperfections in the wall and if you missed any nails you can use it to take them out and use the straight edge to apply a small bit of spackle into the hole).
7. Rags (to clean up spills or to wipe off dust/dirt before you paint a section).
8. Paint! Most important! Have all of the paint(s) you are planning on using. Be sure to have a separate tray/pan for each color.
 Follow this order so that your room comes out looking smooth and the transitions are clean lined. (ceilings, walls, windows, trim and doors).
1. Prepare the room. Cover any items and flooring with tarps or plastic. Remove all hardware; including door knobs, and outlet covers. Here is a helpful tip – tape the outlet cover screws to the cover they go with.
2. Once the main ceiling area is painted you can continue by painting around the edge of where the ceiling and the wall meet. Use a brush and overlap slightly onto the wall.
3. Roll paint evenly on the walls in vertical sections getting close to where the walls adjoin.
4. Cut in with the wall paint the walls between the ceiling and the wall (typically using a 4” brush).
5. Overlap the wall paint onto the baseboard slightly (or if you have natural wood you want to cover the baseboard with painters’ tape).
6. Paint the window frames (typically using a 1” brush). Be sure to open the windows so you can get all areas. Paint the area between the window casing and the wall creating a smooth line (cut in).
7. Paint the baseboard by starting in the middle and working your way to the floor. Next cut in the baseboard towards the wall creating the cut in smooth line.
8. Paint the doors (all hardware including door knobs should have been removed). Follow the grain of the wood for a smooth finish.
9. Paint the door casing. Cut in around the door and wall creating a smooth line.
10. Stand back and admire your incredible handiwork.
11. Clean up your mess. Wash and store your paint brushes for use at another time. Label your paint to which room you used it in and the date.


Recent Comments